
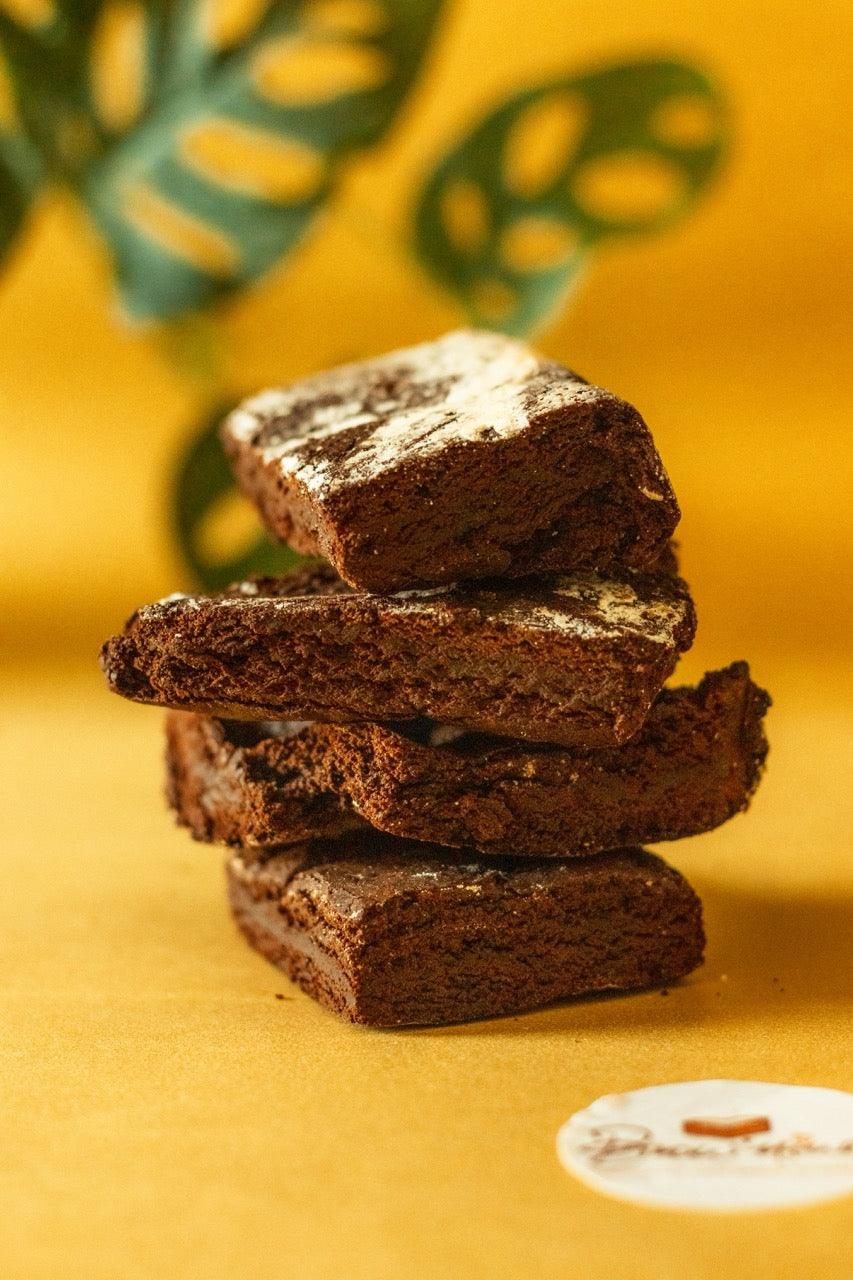
Imagine the aroma of freshly baked brownies wafting through the kitchen – but these brownies are something special! Baking edibles is all the rage among cannabis enthusiasts who don't want to smoke and prefer to indulge in delicious snacks.
This article will tell you everything you need to know about baking edibles – in a relaxed, comprehensive, and easy-to-understand way. Whether you're a complete beginner or already have experience, you'll find tips, tricks, and answers to all your burning questions here. So grab a snack (maybe even a hash brownie ?) and let's dive in!
Key Takeaways: Edible Baking at a Glance
- Baking edibles = processing cannabis into food: Instead of smoking, you enjoy THC in brownies, cookies, etc. This ensures a smoke-free, delicious consumption with a long-lasting effect.
- Don't forget decarboxylation : Before adding the weed to the batter, activate it in the oven at ~115°C . Without decarboxylation, it will have little effect – this step is essential when baking edibles.
- Cannabutter or cannabis oil as a base: THC binds to fat. Homemade cannabutter/canna-oil is the foundation of almost all recipes – easy to make by slowly simmering cannabis in butter/oil.
- Popular recipes: Hash brownies , space cookies, chocolate stars , or even THC gummies – there are countless possibilities. Brownies and cookies are perfect for beginners, as they are simple and, thanks to the chocolate, very cannabis-friendly in terms of taste.
- Dosage is key: Start low (5-10 mg THC per serving) and increase slowly. Use known THC values or online calculators to estimate the mg per serving . “Start low, go slow” prevents unpleasant surprises.
- Be patient while the effects take hold: Edibles take a while to kick in (30-90+ minutes) , but then last for hours. Don't get impatient and take more; wait! Many overdoses occur due to taking more too soon.
- Avoid common mistakes: Don't bake at too high a temperature (THC is destroyed at high temperatures), don't grind too finely, and don't heat butter without water. Stir evenly and sieve properly – this will make your edibles potent and delicious, instead of grassy.
- Be aware of the legal situation: In Germany, edibles are only legal for personal consumption in a private setting (due to limited limits on home cultivation and possession). Sharing or selling them is illegal. So, enjoy them yourself and don't let minors get their hands on them!
- Safe storage: Always keep edibles refrigerated, airtight, and out of reach of unauthorized persons . This keeps them fresh and prevents anyone from accidentally getting hold of them (keyword: childproof lock).
- In case of emergency, stay calm: If you accidentally overdose, stay calm, drink water, take peppercorns, possibly CBD, and above all, wait. It will pass! Nobody dies from too much THC, but it can be unpleasant – so be careful beforehand.
- Happy Baking & Responsible Enjoyment: Baking edibles is fun and allows for creative, long-lasting cannabis experiences. With the right know-how (which you now have 😉) and quality materials – for example, the legal products from Happyflower.io as an alternative – you can safely and enjoyably immerse yourself in the world of homemade cannabis treats. Have fun and enjoy !
What exactly does edibles baking mean?
Edibles are food products containing cannabis – from brownies and cookies to gummy bears. Baking edibles means incorporating cannabis into delicious baked goods or snacks instead of smoking or vaping it. It sounds fancy, but it's actually quite simple: you integrate cannabis (or rather its active ingredients THC or CBD ) into a recipe and end up with a snackable high. A few key points that make edibles special:
- Smoke-free high: Instead of smoke in your lungs, you only have something delicious in your stomach. Ideal for anyone who wants to protect their lungs or avoid the smell of smoke.
- Long-lasting effects: Ingested cannabis products often have a stronger and longer-lasting effect than a joint. While the trip takes longer to kick in, it can last 4-8 hours (or even longer) depending on the dose. Perfect for a relaxing evening on the sofa – less ideal if you still have housework to do afterward. 😉
- A variety of treats: From hash brownies and hash chocolate stars (yes, those chocolatey stars 🍪) to THC gummies – the possibilities are endless. Whatever your sweet tooth desires can probably be enhanced with cannabis.
In short: Baking edibles turns your weed into a tasty treat with a kick . But before you just dump weed into the cake batter – let's look at how to do it properly, step by step.


What ingredients and materials are needed for baking edibles?
Before getting down to business, you should have your ingredients and tools ready. Baking edibles does require a few extras, but nothing you can't find. Here's a short checklist:
- Cannabis : Obviously, no effective edibles without weed. Whether you use flowers (grass) or hashish is a matter of taste. The important thing is quality – clean, dry cannabis with a known THC content is ideal.
- Fat (butter or oil) : The psychoactive components of cannabis (THC, CBD, etc.) dissolve best in fat. For most recipes, you'll need cannabutter or cannabis oil as a base. Regular butter, coconut oil, or olive oil work great as carriers.
- Oven and stovetop : For decarboxylating (don't worry, we'll explain in a moment) and for simmering the cannabutter. An oven thermometer can be helpful to keep an eye on the temperature.
- Grinder or kitchen blender : To grind the cannabis flowers. A normal grinder is sufficient; if necessary, you can also do it by hand with your fingers (it will just get a little sticky 😅).
- Saucepan or heat-resistant container : Melt the butter and simmer the weed. A pot, a small casserole dish, or a double boiler setup (bowl over pot of water) – whichever you prefer.
- A fine-mesh sieve or cheesecloth : Use this to strain the plant residue out of the butter/oil at the end. A coffee filter can also work in a pinch, but it takes longer.
- Baking utensils : mixing bowl, whisk or mixer, baking tin, baking paper – basically everything you need for normal baking of the chosen recipe (don't forget eggs, flour, chocolate etc.!).
- Storage containers : If not everything is eaten immediately – tightly sealing cans or jars, preferably childproof, to keep the finished edibles fresh and safe.
Do you have everything? 🔍 Great. Then let's get started. In the next step, we'll prepare the cannabis itself – keyword: decarboxylation . You'll learn why this is so important and how it works right now.
How do you best prepare cannabis for baking?
Before your weed goes into the dough, it needs to be activated . Raw cannabis barely produces a high, even when eaten – that's because THC in the plant is mainly present as THCA, a precursor without a psychoactive effect. THCA is only converted into THC through heat , and that's exactly what we achieve through decarboxylation (or decarbening for short). Don't worry, it sounds more chemical than it is. Here's how to prepare your cannabis step-by-step:
- Preheat oven: Heat your oven to approximately 110–120 °C . This relatively low temperature is perfect for activating the weed without destroying the active ingredients.
- To prepare your cannabis: Spread your cannabis flowers on a baking sheet lined with parchment paper. Roughly chop them beforehand – about the same way you would chop oregano or basil. Don't grind them too finely, otherwise they'll burn more easily and be harder to sift later. For hashish: crumble it into small pieces so the heat can penetrate it properly.
- Decarboxylate: Place the baking sheet in the oven and "bake" the cannabis for approximately 30–45 minutes . A light roasted smell will rise (make sure to ventilate well, otherwise the whole place will smell like weed 😅). Every 10 minutes, you can gently stir the flowers to ensure even heating.
- Decarboxylation complete: Your weed is fully decarboxylated when it looks slightly brownish and is dry and crispy. Don't leave it in the oven too long – don't burn it! Take the tray out of the oven and let the cannabis cool down a bit.
Now you have activated cannabis , ready to work its magic in butter or oil. 🎩✨ Without this step, you'd have delicious cookies later, but you'd largely miss out on the desired effect. So don't forget decarboxylation – it's the crucial preparation step when baking edibles. Pro tip: If the smell during decarboxylation bothers you (think nosy neighbors 🙈), you can put the weed in a mason jar and place it in the oven with the lid on (don't seal it completely, so pressure can escape). This reduces the smell a bit. Or use special oven bags . Just to be safe, though, open a window!
How do you make cannabis butter or cannabis oil for edibles?
Time for the secret ingredient of all good DIY edibles: cannabutter ! 🍯💚 Whether brownies, cookies, or cakes – in most recipes, you replace regular butter with cannabis-infused butter. It's not rocket science, but it does require some patience. Alternatively, you can also infuse oil (for vegan recipes or if you want to use cannabis oil for gummy bears or cooking, for example). Let's take a look at both options.
produce cannabutter
Ingredients: Your decarboxylated cannabis and butter (salted or unsalted, it doesn't matter). Ratio: Many use about 1 part cannabis to 2 parts butter as a rough guideline. Example: 10 grams of weed and 200g of butter. You can also use less weed, especially if it's potent – "less is more" often applies to avoid over-potency. Steps for homemade cannabutter:
- Melt the butter: Put the butter in a saucepan and melt it over low heat . You can also add a splash of water . The water helps keep the temperature low and prevents the butter from burning or turning brown. (Don't worry, we'll separate the water later – THC loves fat, not water, so the potency stays in the butter.)
- Add the cannabis: Once the butter has melted and is gently simmering (not sizzling!), stir in your decarboxylated cannabis. The mixture should never boil , but rather steep at a low temperature. Set the stove to the lowest setting.
- Simmer: Let the mixture simmer gently for at least 1 to 2 hours . The longer it simmers, the more active ingredients will be released. Two hours is a good guideline. Stir gently from time to time. Make sure nothing burns – if necessary, add a little water if it becomes too dry. Ideally, the temperature should remain below ~160°C to prevent THC from evaporating.
- Straining: Remove the pot from the heat and let the butter cool slightly. Place a fine-mesh sieve or cheesecloth over a glass or bowl. Pour the liquid cannabutter through the sieve. This will leave the plant matter behind. Do not press or squeeze too hard! It's tempting to squeeze out every last drop of butter from the plant matter, but this will only result in more bitter compounds and chlorophyll ending up in the butter. It's better to let it drip through naturally and only press very gently if necessary.
- Separate and chill: If you used water, it will settle at the bottom of the container. Place the jar in the refrigerator. The butter will solidify on top, while the water underneath will remain liquid. You can then simply lift off the solidified butter and discard the water. Voilà – ready-made cannabutter! Store it in the refrigerator, clearly labeled ("Not for breakfast! 😜"), until you need it for your recipe.
Making cannabis oil
If you prefer to use oil instead of butter (e.g., for vegan recipes or because you want to use the oil later for salad dressing, gummies, or cooking), the process is similar:
- Choose a heat-resistant oil with sufficient fat content. Coconut oil (solid at room temperature, melts easily, high fat content) or olive oil are very popular.
- Heat the oil in a pot over low heat. Add the decarbered cannabis (also in a 1:2 or 1:3 ratio, depending on the desired strength).
- Let the mixture heat gently for 1-2 hours . Be especially careful with the oil to ensure it doesn't get too hot – around 100°C is ideal. A water bath works perfectly: place a heatproof container with the oil and cannabis in a pot of hot water; this way you can easily control the temperature.
- Then strain out the plant material, just like you would with butter. Your cannabis oil is ready.
Whether it's butter or oil, this infusion is the heart of your edibles. From now on, you can use it to spice up practically any recipe. 🎂 Simply replace the regular amount of butter/oil (or part of it) in the recipe with your cannabis butter/oil. Make sure to stir well so the active ingredients are evenly distributed throughout the batter. Nobody wants a piece of cake that's all THC while the rest is bland! Note: Cannabutter has a pretty strong smell while you're making it. It's best to make sure your kitchen is well-ventilated or cook it when no one will mind. And, um, maybe don't keep tasting it while you're cooking, no matter how good it smells—the butter is potent! Now that the base is prepared, the most fun question is: What delicious treats are we going to bake? 🤩 Let's check out some popular edible recipes that will impress (and get high) your friends.
Which edibles recipes are best suited for baking at home?
The selection of possible cannabis edibles is huge. Brownies are the first thing that comes to mind – no wonder, hash brownies are a perennial favorite among weed treats. But there's so much more! Here are a few ideas and recipes that are particularly suitable for baking at home:
- Hash brownies (space brownies): The ultimate classic. Chocolatey brownies infused with your cannabutter – moist, sweet, and guaranteed to get you high. Brownies are ideal for beginners because the strong chocolate flavor masks the cannabis a bit. Plus, a brownie recipe is more forgiving of minor mistakes with the quantities. Pro tip: A dash of vanilla and a handful of nuts can take the flavor to the next level . (Fun fact: At Happyflower.io, you can even buy ready-made Grandma's hash brownies – perfectly portioned and super delicious, in case baking them yourself is too much trouble.)
- Cannabis Cookies & Biscuits: Whether crispy chocolate chip cookies or crumbly butter cookies – with cannabutter in the dough, they become "hash cookies." A fun idea, especially around Christmas time: Imagine classic cutout cookies as hashish chocolate stars with a touch of "magic." ⭐ It's important to keep an eye on the oven temperature while baking; many cookies are baked at 160–180°C (325–350°F). If possible, bake at the lower end of the temperature range (or a little longer at a lower temperature) to avoid unnecessarily burning off the THC.
- Space Cake & Muffins: Famous (or infamous) in Amsterdam: the "Space Cake." Basically, any kind of cake will do—lemon cake, marble cake, carrot cake—as long as it's baked with cannabis. Muffins or cupcakes work great too. Get creative with frosting (maybe a green hemp leaf made of icing for decoration?). Keep in mind that the larger/richer the cake, the more difficult it is to measure out the cannabis per slice. So, cut large cakes into smaller portions.
- THC Gummies & Other Treats: Admittedly, gummies aren't baked, but they belong to the edibles category and deserve a mention. Making gummy bears or fruit gummies with THC requires gelatin or pectin, fruit juice, and, of course, cannabis oil or tincture as an ingredient. This is a bit more involved and sticky to make. Alternatively, you can use ready-made THC gummies (Happyflower.io, for example, offers fruity space gummies that are delicious and precisely dosed). For baking enthusiasts, there are other ideas besides gummy bears: how about cannabis chocolate pralines ? Simply mix melted chocolate with a little cannabis butter and pour it into praline molds. Mmm!
Of course, you can adapt any recipe imaginable. From cannabis-infused banana bread to a savory quiche with hemp butter, anything is possible. The only important thing is that the recipe contains fat somewhere, which you can replace with your infused butter or oil. If not, you can also use a tincture (alcohol with dissolved THC), but that's getting too complicated 😉 – let's stick with butter and oil. Have you got a recipe in mind? Great! Then we come to the crucial part: How much weed should you use? The right dosage makes the difference between "relaxing" and "oh god, I'll never come down." So, let's take care of that next.
How do you measure edibles correctly when baking?
Getting the dosage right is truly the key to successful edibles baking. We've all heard stories (or experienced them firsthand) of brownies that were way too overpowering. 😵 To avoid such "surprises," here are a few dosage tips:
- Know the potency of your material: Ideally, you know approximately how much THC your cannabis contains (often given as a percentage). For example, 1 gram of cannabis with 15% THC contains about 150 mg of THC in total. If all of this is evenly distributed into, say, 10 cookies, each cookie would have approximately 15 mg of THC – that's the theory. In practice, some is lost during cooking, and the distribution is never 100% even, but you have a good starting point.
- Calculate the dose per serving: Decide in advance how strong each serving should be. For beginners , 5-10 mg of THC per serving is a good starting point. Experienced users might tolerate 20-30 mg or more, but be careful: THC consumed orally is stronger than when smoked. It's better to be conservative! If your total batter contains, for example, 100 mg of THC, and you bake 10 muffins, each one will have approximately 10 mg.
- “Start low, go slow”: Stick to this motto! It’s better to add less cannabis to the butter at first, or mix the amount of cannabis in the recipe half and half with regular butter to achieve a lower dose. You can always have a second piece if it wasn’t strong enough – but if you accidentally eat too much, there’s no going back.
- Even mixing: Make sure the cannabutter or cannabis oil is evenly distributed throughout the dough . Stir thoroughly, scraping down the sides of the bowl so that all the potency isn't concentrated in one corner. Unevenly distributed THC means one cookie will barely have any effect, while the next one will send you to the moon. 🌝 We don't want that.
- Portion and cut smaller if necessary: Cut brownies into small pieces so you can start with half if you're unsure. For cakes: it's better to cut thin slices. It's tempting to devour a huge piece of chocolate cake – but with edibles, less is often more. Discipline, my friends! 😅
Achieving precise dosing is tricky with homemade edibles. Even professionals sometimes have slight variations. If you want to be absolutely sure, test a small amount of your new batch first (e.g., half a cookie) and wait before going all in. Patience pays off – more on that in the next section. Safety first: Keep in mind that the effects vary from person to person. Weight, metabolism, and how you're feeling that day – all of these factors influence how 10 mg of THC affects you. So be careful with new recipes or batches. And never mix alcohol and strong edibles; that can end very badly. If dosing seems too risky, you could also use professional products. Shops like Happyflower.io, for example, offer pre-portioned and tested THC gummies or hash brownies , so you know exactly how many mg are in each one. This can help you get a feel for the right amount before venturing into your own baking.
When do homemade edibles start to take effect?
So you've taken your fragrant masterpieces out of the oven and can hardly wait to feel the effects. But beware: edibles require patience. ⏱️ Unlike a joint, where you feel something after a few minutes, cannabis cookies tend to keep you waiting quite a while. Typical timeframe: the first effects usually appear after 30 to 90 minutes . Sometimes it even takes 2 hours before you really feel anything. This is because the active ingredient first has to pass through the gastrointestinal tract and is then converted in the liver into an even more potent substance (11-hydroxy-THC). This process takes time. Factors that influence this:
- Stomach contents: If you've eaten something fatty shortly beforehand, or have a lot in your stomach in general, it takes longer. On an empty stomach, initial effects might be noticeable after about 30 minutes, but they often don't fully develop until more than an hour later.
- Metabolism: Every body is different. Some people metabolize THC faster, others slower. That's why person A feels something after 40 minutes, while person B only cautiously asks after 1.5 hours: "Is there anything more to come?"
- Dosage/dose level: A very high dose can sometimes be felt more quickly (because the body is "overwhelmed"), but don't rely on this. Generally, a higher dose tends to prolong the duration of the effect, rather than the waiting time.
Hang in there and don't take another! The biggest trap with edibles is impatience: You eat a brownie, wait 45 minutes, barely feel anything, think "Hmm, that was probably too weak," and then gobble up another... only to bitterly regret it 45 minutes later when both doses hit you hard. 💥 So do yourself a favor: Wait at least 2 hours before deciding to take another. Usually, the effects will kick in eventually. And if you really don't feel much after 2 hours, your dose was probably too low – you can easily increase it next time.
The effects themselves, once they kick in, are also different from smoking: Many describe the edible high as more intense physically (think "couch-lock," you're glued to the sofa) and often mentally stronger, sometimes with more hallucinations or time distortion, especially at higher doses. The trip can last 6 hours or more . So plan plenty of chill time if you're taking an edible. Nothing's worse than realizing after 3 hours of bingeing that you have an appointment in 30 minutes. 😅 In short: Be patient, young Padawan! The effects will come when they want to, not when you want them to. But when they do, you'll understand why edibles are in a league of their own.
What mistakes should you absolutely avoid when baking edibles?
While baking edibles isn't rocket science, there are a few classic mistakes that beginners often make. To prevent your kitchen from ending in chaos or your brownies from becoming inedible, here are the no-gos you should avoid:
- Adding too much cannabis isn't always better. If you indiscriminately throw huge amounts of weed into your butter, you'll eventually reach a point of saturation – fat can only bind a certain amount of THC. The rest is wasted or simply makes the flavor green and grassy . Furthermore, ultra-potent edibles become difficult to dose later on. Stick to sensible amounts. Quality over quantity!
- Forgetting to decarboxylate: The ultimate beginner mistake – not decarboxylating the weed beforehand . 😬 If you simply mix raw cannabis into the batter, some active ingredients will activate during baking, but not nearly optimally. The result: disappointingly weak edibles and wasted potential. So, decarboxylation is a must, not an option!
- Excessive baking temperatures are detrimental: THC and terpenes don't tolerate harsh heat. THC begins to degrade at around 160–170°C. If you partially burn your edibles at 200°C, you'll destroy some of the active ingredients. Bake at moderate temperatures whenever possible. Many recipes can be baked for a longer time at 150°C instead of a short time at 180°C. And on the stovetop: only simmer butter, never let it boil vigorously.
- Don't use water when making cannabutter: This is a pro tip many people don't know. Without a splash of water, your cannabutter can get too hot and burn – and just like that, the active ingredients are gone. Water helps regulate the temperature (max 100°C as long as there's still water in the butter). It also binds a little chlorophyll and bitter compounds. We'll separate it out anyway. Heating your cannabutter on its own is more likely to ruin it.
- Grinding weed into powder: Sure, you need to grind the cannabis, but don't overdo it. If you grind your weed to dust, you'll end up with butter that's dark green and tastes extremely herby because too much plant material gets through. Yuck. A medium grind is perfectly sufficient, so that the oil gets to the inside of the buds.
- Poorly strained (and pressed): A common mistake: People don't want to waste any THC and squeeze the herb residue in the sieve too hard. The result: more sediment in the final product, which makes the taste harsh and can reduce shelf life. It's better to let it drip patiently. And use a fine sieve or cloth so that crumbly bits don't end up all over your brownie.
- Uneven mixing: As mentioned before, if you don't mix the cannabis butter in well, you'll get hot spots. Imagine one muffin gets 90% of the THC from the entire batch, while the one next to it gets almost none. One friend flies to Mars, the other feels nothing and might eat even more out of frustration... oh dear. So: Stir, stir, stir until the batter is homogeneous.
- Snacking while baking: Yes, the dough with cannabutter smells good and tastes interesting – but don't eat too much of it raw! 😂 Firstly, raw dough is unhealthy (think salmonella), and secondly, you could unknowingly get high before the actual edibles are ready to serve.
- Impatience when eating: The biggest mistake outside the kitchen: You eat an edible, wait 30 minutes, and think, "It's not working, I'll have another one." Classic! An hour later, you're lying in bed shaking, hoping the effects will pass. Do n't do that . Always wait long enough, at least 1.5-2 hours, before having another. Your future high self will thank you.
- Leaving edibles lying around: Last but not least, a safety mistake: Don't leave your cool hash brownies carelessly lying around the apartment, especially not within reach of children or unsuspecting roommates . This could end badly if someone unknowingly helps themselves. Always clearly label and lock away anything that isn't meant for everyone.
Phew, that sounds like a lot of stumbling blocks – but it's not so bad: If you keep these points in mind, you'll be pretty much on the safe side. And let's be honest, even if something goes wrong: Most mistakes only happen once. Afterwards, you know better (or you laugh about it afterwards, once the dust has settled... or the brownie has been digested). 😉
What legal aspects are important when baking edibles?
Before you eagerly start cooking, let's take a look at the legal situation – a bit of a buzzkill, I know, but important. 😇 In Germany, there have been some legal changes regarding cannabis (as of 2025), but baking edibles isn't entirely without its pitfalls:
- Possession and home cultivation: A new cannabis law has been in effect in Germany since 2024. Adults are allowed to possess up to 25 grams of cannabis and even grow their own plants (max. 3) at home – but only for personal use . This means that if you use your own legally grown weed to make cookies and eat them yourself, you're within the law. (Provided you're over 18 – which you are, otherwise you wouldn't be reading this, right? 😉)
- Sharing prohibited: This is very important and often misunderstood: Even though you are now legally allowed to possess weed, you are not allowed to give or sell edibles to third parties . The new law permits the distribution of cannabis only in its "pure form" (i.e., flowers or hashish), and even then, only within licensed cannabis clubs and to their members. Strictly speaking, giving a THC-infused brownie to your friend would not be legal because it is no longer "pure" cannabis, but a processed product. So, it's best to keep your homemade masterpieces to yourself (as hard as that may be when Mom wants a taste of the delicious cake...).
- Public consumption: Consuming cannabis in public is restricted – in some places completely prohibited (e.g., near schools, playgrounds, etc.). A cookie might look like a normal cookie, but be discreet anyway. 😉 And never drive! You can still be impaired hours after consuming an edible, so no cars, no e-scooters, nothing like that. The police don't mess around, and the legal limit for THC in the blood is low.
- Production and Ingredients: Buying cannabis outside of medical purposes remains complicated. If you don't grow your own, your weed might come from the black market – which is illegal in itself. Furthermore, you never know if the weed is potentially contaminated (pesticides, adulterants). It's risky both legally and health-wise. This is where something like Happyflower.io shines: They sell legal cannabis alternatives (e.g., with HHC or other permitted cannabinoids) and ready-made edibles that are tested and safe. This way, you get the effect without breaking the law or dealing with shady products.
- Protect minors: If you store edibles at home, make absolutely sure that children or teenagers cannot access them. This is not only morally important, but you will be liable if a minor gets hold of drugs due to your negligence. So: always lock them away and label them, as already mentioned.
The short version : Check the local laws! What applies in Germany might be different in Austria or Switzerland. In some countries, even minimal THC-containing edibles are strictly prohibited, while in others you can buy THC lollipops in stores. In Germany, we're currently moving towards more freedom, but there are clear limits. Stick to them, and you can enjoy your hobby without worrying about the law. And honestly: nothing builds trust more than transparency. That's why Happyflower.io, for example, openly communicates which active ingredients are in their edibles (often alternative cannabinoids that are legal) and which aren't. This way, you know exactly what you're consuming and can stay on the safe side. Trust is good, lab-tested is better!
How do you store homemade edibles correctly and safely?
Let's say your baking endeavor was a complete success and you now have a pile of space cookies or brownies – of course, you don't eat them all at once (please don't! 😜). So you need to store these delicious treats properly to keep them fresh and prevent unauthorized access. Here are a few tips for storing homemade edibles:
- Airtight packaging: Just like with regular cookies/cakes, they'll keep longest in an airtight container or freezer bag . Oxygen and moisture promote mold and cause baked goods to go stale. So store your edibles in a glass jar with a lid, Tupperware, or something similar.
- Store in a cool, dark place: Heat and light reduce THC potency over time. A cool, dark place is ideal. A refrigerator works very well, especially for brownies and butter-based products (it also prevents the chocolate from melting). Most edibles will stay fresh in the refrigerator for 1-2 weeks .
- Freezing for longer storage: If you want to bake in advance or stock up for a longer period, you can also freeze edibles. They will keep for several months in the freezer. It's best to portion them beforehand (e.g., wrap brownies individually) so you can thaw as needed. The potency is largely retained when frozen; it might decrease slightly over many months – but this is negligible as long as they are well packaged.
- Odor control: Keep in mind that highly infused edibles can easily develop a cannabis smell (especially with prolonged storage or if a lot of plant material remains). Store them in neutral containers and maybe not right next to your breakfast rolls 😅. In the refrigerator, it's best to place them at the back.
- Safety/Child Protection: We've already mentioned it, but it's so important: Keep your edibles out of reach of children . A lockable container or a tall cabinet is ideal. Clearly label the box, e.g., " Caution: Cannabis Edibles - Do Not Eat! ". This way, even an unsuspecting roommate won't accidentally help themselves at night.
- Keep an eye on the shelf life: Unfortunately, cannabis doesn't prevent mold from taking hold eventually. Check your baked goods occasionally – if they smell unusual (not the weed smell, but sour/musty) or if you see small fuzzy bits, throw them away. The same goes if they taste rancid. When in doubt, it's better to bake fresh new ones than to take the risk.
Basically, you treat homemade edibles like regular cakes or cookies, just with extra care because of the active ingredients. If stored properly, you can enjoy them for a long time. And let's be honest, your stash probably won't last that long , right? The next sweet treat is just too tempting… 😋
What to do if edibles have been accidentally overdosed?
Oops, now we've done it... Despite all precautions, it can happen: You or a friend overdid it and the edible hit you way too hard. 😵💫 Maybe you were too greedy, took another one too soon, or the butter was more potent than you thought. Don't panic! Really, the most important thing is to stay calm. Here's a little first-aid guide for just in case:
- Keep calm and chill out: Even if you feel uneasy right now, it will pass. No one has ever died from a THC overdose. Your body simply needs time to metabolize the THC. Remember: You're not poisoned in the traditional sense, you're "just" too high. Sit or lie down comfortably and take deep breaths. Try not to panic, even if it's difficult. Remember: It's temporary, and in a few hours you'll be back to normal.
- Hydrate yourself: Drink a large glass of water or juice. Edibles can dry out your mouth (think cotton mouth), and dehydration worsens discomfort. Fluids also help your body boost its metabolism a bit. You should avoid alcoholic drinks right now – they can make everything worse.
- Chewing peppercorns: Sounds like grandma's home remedy, but it really helps many people! 😮 Black pepper contains the terpene caryophyllene , which binds to the same receptors as THC and can alleviate anxiety/panic symptoms. Simply chew a few whole peppercorns carefully or sniff them. The pungent smell/effect often grounds you a bit. (But don't overdo it – a little pepper, otherwise you'll end up sneezing uncontrollably…)
- CBD as an antidote: If you happen to have CBD oil or CBD flowers on hand, you can take some. CBD acts in the body as a kind of counterpart to THC and can mitigate its effects. A few drops of CBD oil under the tongue or a CBD joint (if you're still lucid enough to smoke) can help calm you down.
- Distract yourself and relax: Put on some quiet , relaxing music or a funny show—anything calming to take your mind off things. Sometimes focusing on it can actually make you feel more high. Better options include a cozy blanket, your favorite movie on Netflix, or a video game that doesn't require an adrenaline rush. Some people also find a hot shower or bath comforting—warmth is relaxing. The important thing is that you feel safe. Maybe call a good friend (or if they're there, let them comfort and keep an eye on you). Talking can help push away negative thoughts.
- Get some fresh air: If you're not feeling dizzy, take a walk outside (but stay close by, so you don't get lost). Sometimes a stroll in the garden or on the balcony helps clear your head. The cool air and exercise can help stabilize your circulation.
- Just wait it out: Yes, unfortunately – ultimately, only time helps. Depending on the overdose, the condition can last for a few hours. Try to accept it and make yourself as comfortable as possible. Sleep is a great remedy, by the way: If you can lie down and doze off, do it! You'll very likely wake up much more sober. Meanwhile, your body is working diligently to bring you down.
If extreme symptoms do occur (severe heart palpitations, circulatory problems, uncontrollable panic attack) and you feel like you can't take it anymore, don't hesitate to seek medical help. If in doubt, call emergency services – they might roll their eyes because they've already dealt with their umpteenth "too high" patient of the day, but it's better to be safe than sorry. Normally, though, this is rarely necessary. Most THC overdoses resolve themselves without medical intervention. As a preventative measure, you can learn from this: dose more carefully next time! 😉 Everyone experiences an overly intense edible trip at some point; it's almost inevitable. The important thing is to learn where your personal limit lies. Then you can adjust the dose better on your next baking adventure and enjoy your high much more.






Share:
HHC Dosage: How do I dose hexahydrocannabinol correctly?
Why is the question "How do you consume HHC?" so frequently asked in 2025?